Create Restful API Within Minutes with FeathersJSDNX |
Creating a Restful API has never been easier with FeathersJS. In the tutorial, we will use MongoDB as an example to show you how quickly we can set up a state of the art API.

I assume that you have NodeJS installed, if not, then I recommend installing NVM if you are using *NIX, macOS, or windows WSL.
And I assume you have MongoDB server running. By the way, if you don't have MongoDB installed yet, I suggest you check out the official How-to .There are many ways to install MongoDB, The online tutorials are overwhelming. Following the official guide will save you a lot of time.
Okay, now you have NodeJS & MongoDB installed, let's go.
Step one
Install feathersjs-cli (a powerful command-line tool ever!)
npm install -g feathersjs-cliStep two
Create a new folder for our API:
mkdir feathers-demo
cd feathers-demo
Step three
Run the following command to auto-generate an application (in our case, API)
feathers generate appWe would need to go thru some questions during the generation, but they are pretty straightforward, see the example answers below:
? Do you want to use JavaScript or TypeScript? JavaScript
? Project name feathers-demo
? Description Demonstrate how easy it is to create a restful api
? What folder should the source files live in? src
? Which package manager are you using (has to be installed globally)? npm
? What type of API are you making? REST, Realtime via Socket.io
? Which testing framework do you prefer? Jest
? This app uses authentication Yes
? Which coding style do you want to use? ESLint
? What authentication strategies do you want to use? (See API docs for all 180+ supported oAuth providers) Username + Password (Local)
? What is the name of the user (entity) service? users
? What kind of service is it? Mongoose
? What is the database connection string? mongodb://localhost:27017/feathers_demo
Please pay attention to those answers:
- Yes, we uses authentication
- We use “ Username + Password (Local)” for authentication strategy
- The name of user service is “users” - the feathers-cli will generate this service for us
- We use Mongoose instead of MongoDB for DB Adapter
As you see, the database connection string we chose is "mongodb://localhost:27017/feathers_demo". If you do so, then don't forget to create a database now. I recommend using "NoSQLBooster for MongoDB" (The free version is good enough to do our job.)
Again, before continue, Please make sure that your mongodb database is running, the username/role is correct, and "mongodb://localhost:27017/feathers_demo" is reachable and the database has been created.
Step four
Run the following command to start the server:
npm run devBelieve it or not, we just build the first real-time and REST API. If everything is good, you should see the page like this, if you open localhost:3030 in your browser.
But we are not there yet. If your open localhost:3030/users in your browser, you will see a 401 Not Authorized page. That's because we chose "This app uses authentication", and authentication is required for listing users.
//The file is located at: feathers-demo/src/services/users/users.hook.js
module.exports = {
  before: {
    all: [],
    find: [authenticate("jwt")],
    get: [authenticate("jwt")],
    create: [hashPassword("password")],
    update: [hashPassword("password"), authenticate("jwt")],
    patch: [hashPassword("password"), authenticate("jwt")],
    remove: [authenticate("jwt")],
  },
Besides we haven't created the users collection and have no users yet. Because we chose 'mongoose' during the API generation, it should generate a folder 'models' under 'src', where we will see a user.model.js. And the default schema is:
//The file is located at: feathers-demo/src/models/users.model.js
 const schema = new mongooseClient.Schema({
    email: { type: String, unique: true, lowercase: true },
    password: { type: String },
  }, {
    timestamps: true
  });
The easiest way to call/test restful api is using Postman.
To create a user, we can use the following info in the Postman
Method:
Post

API Endpoint:
http://localhost:3030/users

HEADERS
Accept: application/json
Content-Type: application/json

BODY raw
{
  "email": "demo@example.com",
  "password": "secret"
}
Then we can get the authentication token, by calling /authentication with the username/password you just created. The token generated will be used to access all services requiring authentication.
Method:
Post

API Endpoint:
http://localhost:3030/authentication

HEADERS
Accept: application/json
Content-Type: application/json

BODY raw
{
"strategy": "local",
"email": "demo@example.com",
"password": "secret"
}
Step five
So far we have users service. Next, we are going to create a new service. We will create a todo service. I know it's boring, but I cannot think of anything better now.
Back to command line,
feathers generate serviceAgain, we would need to go thru some questions during the generation, but it's much shorter this time:
? What kind of service is it? Mongoose
? What is the name of the service? todos
? Which path should the service be registered on? /todos
? Does the service require authentication? Yes
After that, we will see a new todos model created, and the schema looks like this:
//The file is located at: feathers-demo/src/models/todos.model.js
const schema = new Schema({
  text: { type: String, required: true }
 }, {
  timestamps: true
 });
This is default schema, and we will update it like below:
Open model/todos.model.js
const schema = new Schema({
task: { type: String, required: true }
done: boolean
}, {
timestamps: true
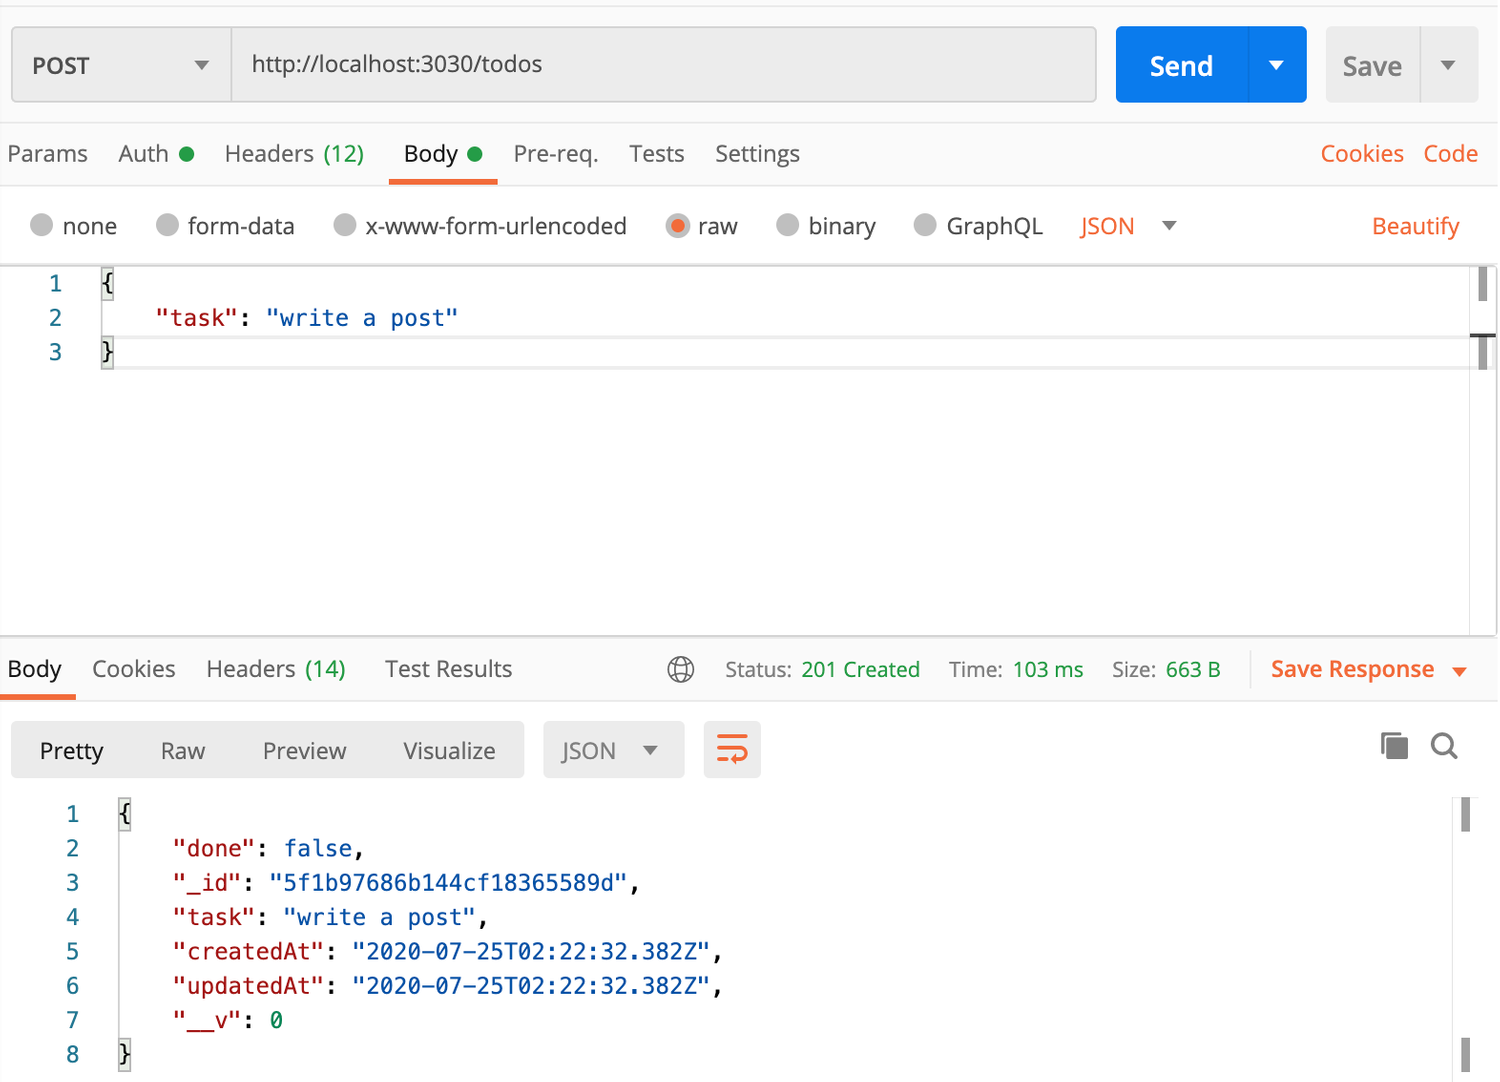
});Then, we can use Postman to create a new task:
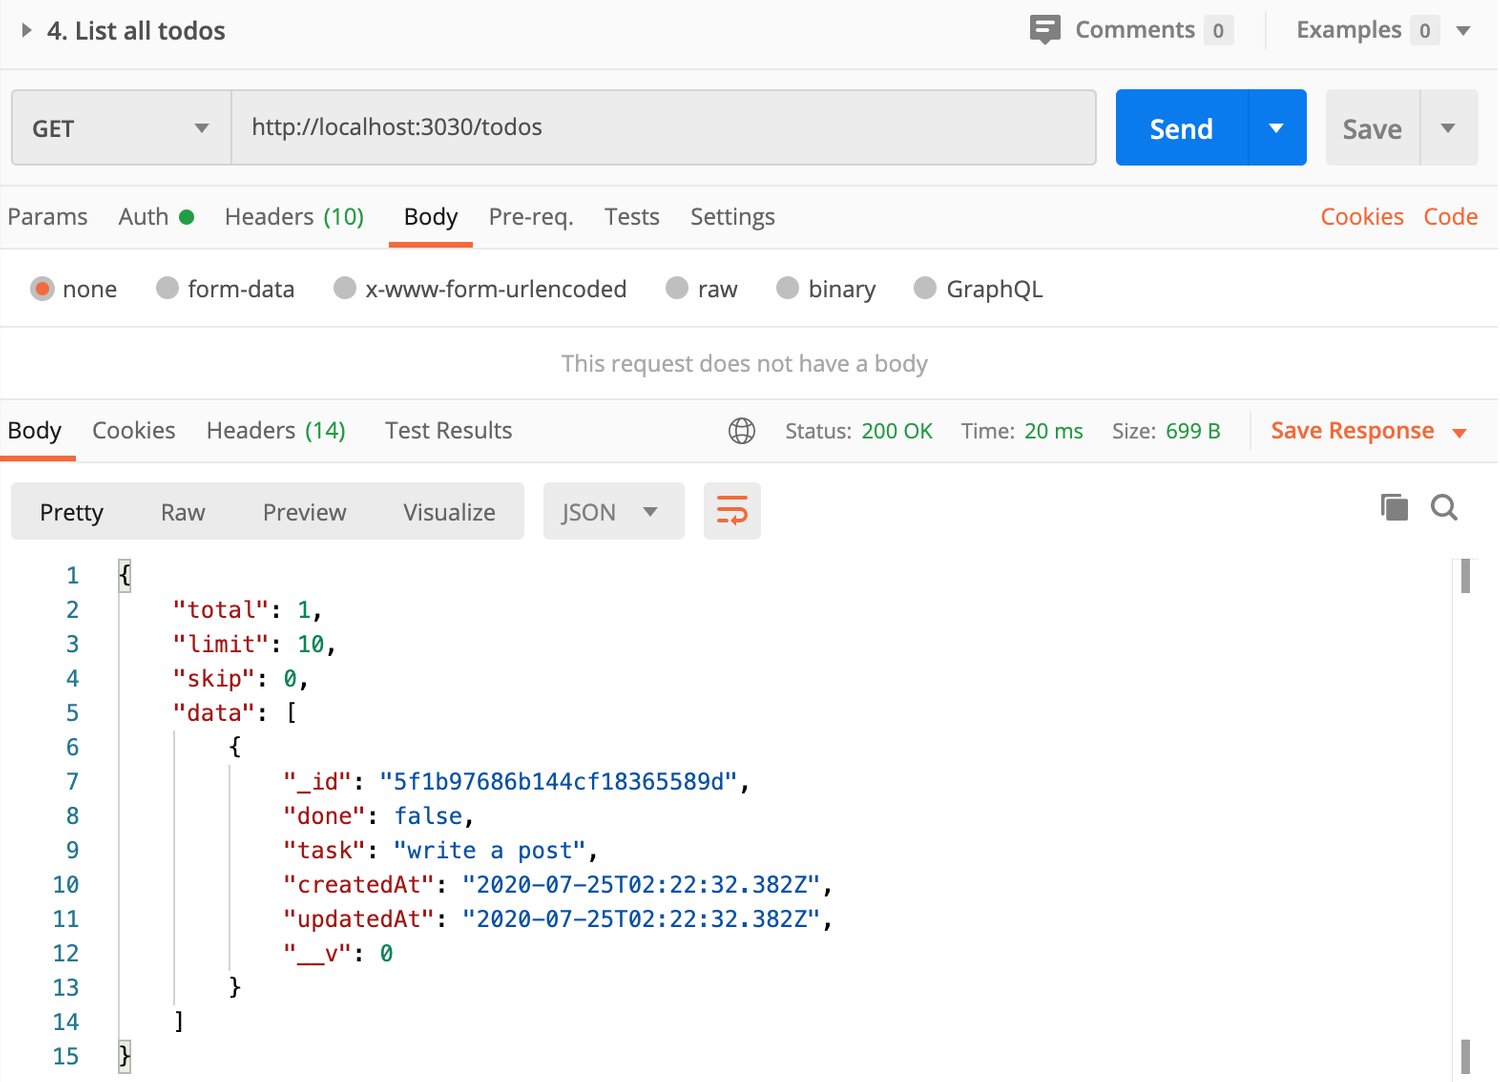
After that, we can use Postman to get the list of todos:
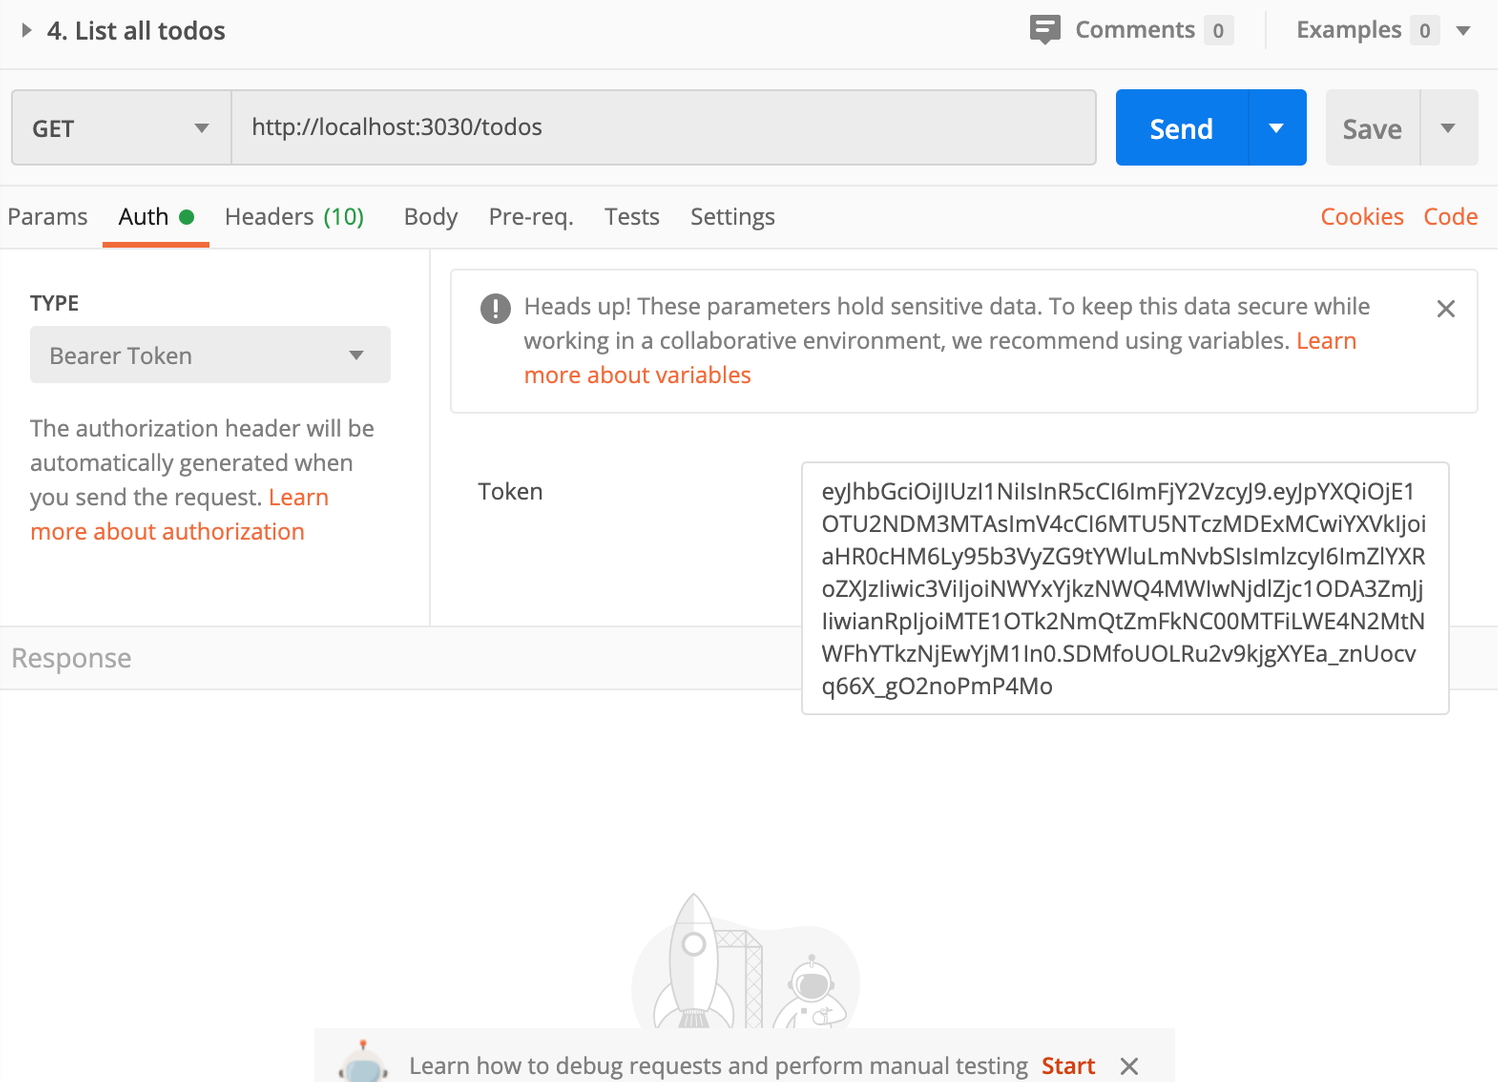
Since we set up todo service that requires authentication, we have to add Bearer Token in ‘Auth’ tab like below:
Here is the mapping of service methods to REST API calls:
| Service method | HTTP method | Path |
|---|---|---|
| .find() | GET | /messages |
| .get() | GET | /messages/1 |
| .create() | POST | /messages |
| .update() | PUT | /messages/1 |
| .patch() | PATCH | /messages/1 |
| .remove() | DELETE | /messages/1 |
Okay. That's it. Next time, I will show you how to build a REST client using Axios.
Bonus
The Postman API call collection used in the tutorial can be download at: https://github.com/deniapps/featherjs-postman.